


1000 lumenin Trionic LED -etuvalo
Tässä käyttöohjeessa näytetään sekä valopidikkeen ja valon kiinnittäminen Walker-laitteeseen (vasen sarake alla) että niiden kiinnittäminen Velopediin (oikea sarake alla).
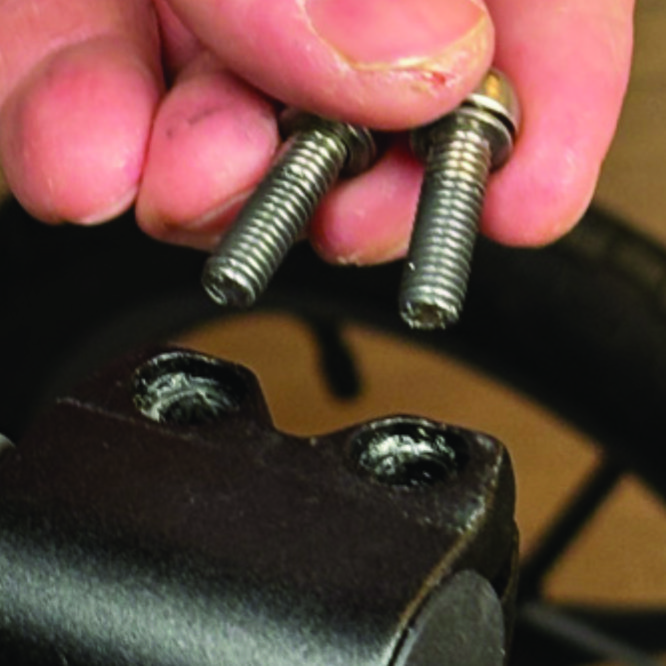
Vasemmanpuoleisessa kuvassa A näyttää Walkerin pidikkeen kiinnitysosat (2 ruuvia + 2 aluslevyä). B näyttää Velopedin pidikkeen kiinnitysosat (1 ruuvi + 1 pyälletty mutteri + 1 mutteri).

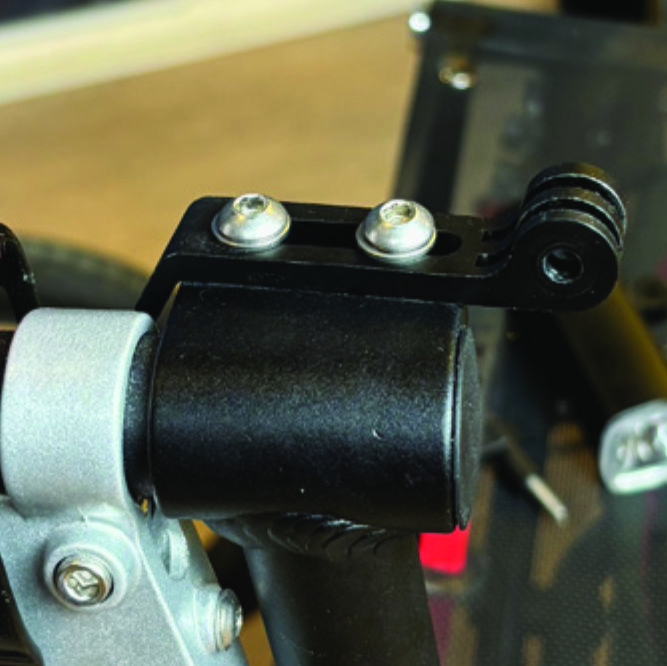
Valonpitimen kiinnittäminen
Ohjeet kävelytuelle


Ohjeet Trionic Velopedin käyttöön


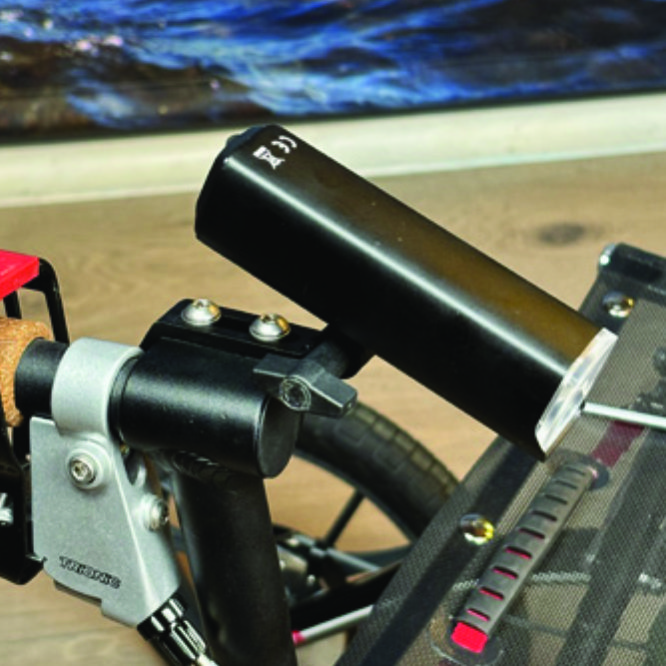
LED-valon kiinnittäminen pidikkeeseen
Ohjeet kävelytuelle

Ohjeet Trionic Velopedin käyttöön


Käyttöohjeet
Yleiskatsaus

Varoitus
On normaalia, että akku saavuttaa korkean lämpötilan (jopa 40 °C) latauksen aikana akun kemiallisten reaktioiden vuoksi. Akku voi myös lämmetä, jos sitä ei tyhjennetä kokonaan ennen lataamista. Useat tekijät voivat vaikuttaa akun käyttöikään, mukaan lukien kennon tyyppi, käyttörasitukset, huoltorutiinit, lämpötila ja latausjaksojen määrä. Yleensä suurempi akun kapasiteetti johtaa pidempään käyttöaikaan. Akun kapasiteetti voi laskea noin 80 prosenttiin alkuperäisestä kapasiteetistaan 300–500 lataus-/purkausjakson jälkeen. Asianmukaisella hoidolla akun käyttöikä voi olla jopa 3 vuotta. Vedenpitävä on tarkoitettu vain sadevedelle. Älä upota akkua tai koko valaisinta veteen puhdistuksen aikana. Puhdista valaisin pehmeällä, kostealla liinalla tarvittaessa.
Akun suorituskyky
Lämpötilan vaihtelut vaikuttavat merkittävästi akun suorituskykyyn: • Alhainen lämpötila: 0 °C:ssa kapasiteetti laskee 5–10 %, mikä lyhentää käyttöaikaa 50 %. -20 °C:ssa kapasiteetti laskee 30 %, mikä voi lyhentää käyttöaikaa 70 %. Suorituskyky palautuu normaaliksi, kun lämpötila nousee 20 °C:seen. • Itsepurkautumisnopeus: Huoneenlämmössä akku menettää noin 1 % kapasiteetistaan päivässä. 40 °C:ssa säilytettäessä itsepurkautumisnopeus kasvaa, mikä johtaa noin 5 %:n kapasiteetin menetykseen päivässä. Akun optimaalisen suorituskyvyn ylläpitämiseksi vältä altistamista äärimmäisille lämpötiloille ja säilytä sitä viileässä ja kuivassa paikassa. Jos et käytä akkua pitkään aikaan, muista ladata akku kolmen kuukauden välein.
Vikasietotila
Kun akun varaus on vähissä, valo vaihtaa automaattisesti 50 lumenin kaukovalojen turvatilaan, mikä antaa 30 minuuttia lisää käyttöaikaa.
Valon käyttöohjeet
Paina kytkintä ja pidä sitä painettuna kahden sekunnin ajan kytkeäksesi valon päälle tai pois päältä. Napsauta kerran selataksesi tiloja ja kaksoisnapsauta ottaaksesi käyttöön erittäin kirkkaan tilan (1000 lm).

Pakkaus sisältää

Lataus ja varavirtalähde


