We believe we have an online store closer to you. Would you instead like to visit: Canada International Australia Ireland UK USA

LED Rear Lights 70 Lumen Rechargeable (pair)

Rear Light for Rollators

SKU: 11-90-037
Stock Status: In Stock
Delivery Status: 3-5 working days
51.68 €
Including Tax: 10.50 € (25.5%)
pcs

Rollator LED Rear Lights 70 Lumen with Rechargeable Batteries (pair)

Purpose:         To be seen
Light power:   70 Lumen

Key Features:

  • Bright and clear lighting: Features both flood and spotlight LEDs for maximum visibility
  • Multiple modes: Steady, flashing, or combined – choose what suits your needs
  • Rechargeable battery: 400 mAh Li-poly battery provides up to 4+ hours of runtime
  • Easy mounting: Comes with seatpost and saddle brackets, plus zip ties for simple attachment to rollator frames.
  • Durable build: Matte black anodized aluminum – built to withstand everyday outdoor use

What’s Included:

  • USB-C charging cable
  • Mounting brackets (seatpost & saddle)
  • 2 different attachment straps, both for the Veloped and the Walker
  • User manual

Whether you're walking through the city or enjoying nature at dawn, the Trionic LED Rear Lights helps ensure you're seen – and safe.

Max. lumens:70 Lumen (Red)
Main materials:Aluminum alloy frame+PC
Accessories included: Seatpost bracket, Saddle bracket,
Nylon ties*2, USB cable, Manual
Charging port: Type-C
Color: Matt black+red lens
LED type: 20PCS Red COB CHIPs (LED A, flood light) +
1pc XP-E2 Red LED (LED B, spotlight)
Battery capacity: 400mah rechargeable li-poly
Charge time: 3h
Size (W/O bracket): 38.5(L)*29(W)*32.2(D)MM
N.W (W/ bracket): 40.3g
Finish: Fine anodizing

User Guides

The documentation for this product includes the manuals and instructions listed below. You can choose to view the documentation online or download it for local use.

70 Lumen Trionic LED Rear Lights (pair)

This manual both shows how you attach the rear light and the light on a Walker (left column below) and also how you attach them on a Trionic Veloped (right column below).

In the left-hand photo, A shows the 10-degree angled strap for attaching the lights on a Trionic Walker. B shows the 0-degree angled strap for attaching the lights on a Trionic Veloped.

B shows the 0-degree angled strap for attaching the lights on a Veloped.

70 Lumen Trionic LED Rear Lights

Attaching the LED Lights

Instructions for a Walker

Of the two rubber straps included, choose the one with a 10-degree angled light attachment section.
A1. Of the two rubber straps included, choose the one with a 10-degree angled light attachment section.
Push the light into the slot of the strap until it snaps in place.
A2. Push the light into the slot of the strap until it snaps in place.
Attach the light to the Walker, either on the semi-vertical frame tube just below the height adjustment quick-release lever, or on the black semi-vertical grip tube. Pull the strap tight and fix it with the plastic hook.
A3. Attach the light to the Walker, either on the semi-vertical frame tube just below the height adjustment quick-release lever, or on the black semi-vertical grip tube. Pull the strap tight and fix it with the plastic hook.
Pull the strap tight and fix it with the plastic hook.
A4. Pull the strap tight and fix it with the plastic hook.

Instructions for a Trionic Veloped

Of the two rubber straps included, choose the one with a 0-degree angled light attachment section.
B1. Of the two rubber straps included, choose the one with a 0-degree angled light attachment section.
Push the light into the slaot of the strap until it snaps in place.
B2. Push the light into the slaot of the strap until it snaps in place.
Attach the lights to the Trionic Veloped, preferably on the two rear vertical frame tubes, below the height-adjustment quick-release levers. Pull the strap tight and fix it with the plastic hook.
B3. Attach the lights to the Trionic Veloped, preferably on the two rear vertical frame tubes, below the height-adjustment quick-release levers. Pull the strap tight and fix it with the plastic hook.
Pull the strap tight and fix it with the plastic hook.
B4. Pull the strap tight and fix it with the plastic hook.

Instructions for Use

The package contains

Caution

It is normal for the battery to reach a high temperature (up to 104°F / 40°C) during charging due to chemical reactions within the battery. The battery may also become warm if it is not fully drained before charging.

Several factors can affect the battery's lifespan, including the type of cell, usage strain, maintenance routine, temperature, and the number of charge cycles. Generally, a higher battery capacity results in a longer operation time.

The battery capacity may decrease to approximately 80% of its original capacity after 300–500 charge/discharge cycles. With proper care, the battery can have a lifespan of up to 3 years.

Water resistant is for rain water only. Do not submerge the bat- tery or the whole light into water when cleaning. Clean the light with a soft damp cloth when needed."

Battery Performance

Battery performance is significantly affected by temperature variations:

Low Temperature: At 0°C, capacity decreases by 5–10%, reducing operation time by 50%. At -20°C, capacity drops by 30%, potentially shortening operation time by 70%. Performance returns to normal when the temperature rises to 20°C.

Self-Discharge Rate: At room temperature, the battery loses about 1% of its capacity per day. When stored at 40°C, the self-discharge rate increases, leading to a loss of approximately 5% of capacity per day.

To maintain optimal battery performance, avoid exposing it to extreme temperatures and store it in a cool, dry place.

If you do not use the battery for a long time be sure to recharge the battery every 3 months.

How to charge the battery

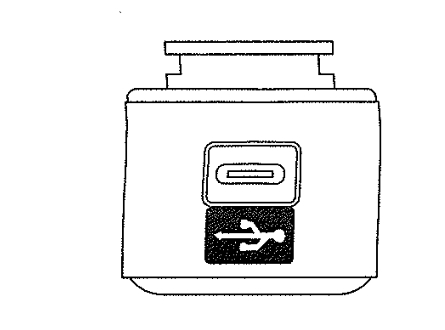
  1. Find the charging place at the bottom of the light.
  2. Lift the rubber cover to access the charging port.
  3. Plug the USB-cable into your USB-charger.
  4. Plug the charging cable into the light's charging port.
  5. The indicator shows red during charging.

The charging indicator turns green when fully charged.

Attention: Use the original supplied USB-cable to charge the battery. Unplug the charging cable once the battery is fully charged.
How to charge the battery

How to operate the light

How to operate the light text

Safe Mode

When the battery is low, the light will automatically switch to a 5-lumen steady mode, providing an additional 30 minutes of operation.

Customer Reviews

Be the first to post a review for this product

General FAQ

Relevant Guides

Search help

Also Purchased Products

Product Reviews    

  • Absolutely delighted with my Veloped and worth every penny.…

    Beautifully made and well designed.

    I broke my back nearly two years ago . I also have polymyalgia, fibromyalgia, osteoporosis, osteoarthritis and liver disease so was quite inactive even before then.

    I am still building up my stamina, but c…

  • Thank you…

    Received my Trionic this week and am very impressed, improved my mobility.…

  • Excellent well engineered product…

    I am tall and the Walker 14er gives me much more stability and confidence when walking.
    Much more stable when working on uneven ground. Whilst more expensive than other products, it is a much superior product.
    I would recommend to anyone considerin…

  • I suffer from polyneuropathy, so I have really bad balance and vacillate…

    Sticks don't really help, and it's so uncomfortable that at some point you don't even want to go out anymore. Three months ago, it was clear to me that I would need a rollator if I wanted to enjoy being out in nature again.

    Before buying, I inform…

  • Glad I bought it!…

    I am very pleased with my Veloped walker. It is easy to walk with it in the woods and I am able now to walk places I could not walk before. Very happy with my purchase.
    Barry Szymanski
    Brookfield, Wisconsin…

  • Great company - Great product!…

    I've been using a solid wheel rollator walker for 3 years. I wish I'd known about Trionic from the start! My old rollator broke for the second time in 2 years. They claimed it was an all-terrain rollator, but it obviously couldn't keep up with me as …

  • Rain cover…

    What should I review?
    The cover is fine and stays secure even in thunderstorms and rain. Leaving it for days under the scorching sun is not good - there is a risk that it will crack.…

    Veloped Storage Rain Cover
    by Heribert Holtermann
  • Expectation fully met…

    After the expected prompt delivery, there was an initial problem with one of the two brakes. We received a precise description of how to remedy the problem by phone and email. Since then, see above.…

  • Able to walk outdoors again…

    The Trionic Veloped Sport was an excellent purchase. Because of cerebellar ataxia, I am no longer able to walk without a rollator. This device allows me to walk outdoors again, which is huge! It is worth every cent.…

Subscribe to our newsletter!